In this blog post, I want to explain how to work increases and decreases into your Granny stitch garments, to tailor them to fit you perfectly. They can be worked down the sides of your garment, or down the length of a sleeve to taper or flare it. This works whether you are working bottom-up or top-down garments, but it works better with top-down garments as you can try it on as you go.
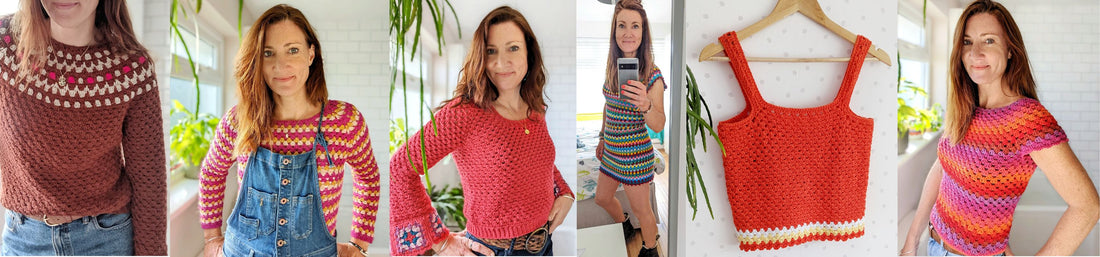
These methods were ones I came up with a few years back, when I first started designing in Granny stitch. I use them a lot in my patterns now and they will work on any of my top-down patterns, including the ones in my book. The Faraway jumper uses these increases in the yoke and has decreases down the body and sleeves, but you could use them on the Granny Go Round jumper, the Granny Go Round vest, the Rumours vest and the Lowrider jumper to name a few. I used a lot of these to shape my Granny Go Round dress pictured below.


Instructions:
(exchange tr for dc for US crochet terms).
Increase and decreases are worked over a pair of rounds. The first round sets up the increase or decrease and the second round makes the increase or decrease. These are usually referred to as Increase R1 and Increase R2 or Decrease R1 and Decrease R2 in my patterns. If you are working in stripes, its a good idea to ensure that both these rounds are the same colour, to camouflage them. I did this on the top pictured above, but not the dress as the stitches were smaller and harder to see.
Decreasing on the sides of the body
If you have a significantly smaller waist than bust, or just prefer a more fitted top, you may wish to taper your garment slightly at the sides, as you work your way to the hem.


Once you have started the main body, work body rounds as normal until you are just below the largest part of the bust. Start the next round and work as normal until you are directly under the centre of the first underarm. Work a 2tr group (you may need to work another round first, before you can line up your 2tr group directly in line with the centre of the underarm). Continue to work your 3tr groups as normal until you are at the centre of the underarm on the other side. Work another 2tr group. Complete your round as normal. Begin your next round as normal. When you reach each of the 2tr groups, miss the sp before the 2tr group, work a 3tr group into the centre of the 2tr group, and miss the sp after it. See the diagram above. Continue your round as normal. You will have decreased by two 3tr groups – one on each side.
Decreasing down a sleeve
You can also use this method for decreasing down a sleeve, such as on the Granny Go Round jumper. Once you have started the sleeve, work sleeve rounds as normal until you want to decrease. Start the next round and work as normal until you are directly under the centre of the underarm. Work a 2tr group. Complete your round as normal. Begin your next round as normal. When you reach the 2tr group, miss the sp before the 2tr group, work a 3tr group into the centre of the 2tr group, and miss the sp after it. Continue your round as normal. You will have decreased by one 3tr group.
Further decreases
If you need to decrease further, leave at least 3, 5, 7 or 9 rounds, before starting this process again. Leaving an odd number of rounds ensures that they will line up under each other. Always check the garment still fits over your shoulders or arm.


I used decreases to taper the sides and sleeves of this Granny Go Round jumper.
Increasing down the sides of your garment
If your tummy area is larger than your bust, or you prefer a looser fit around the waist, or are simply after an A line shape, you may wish to increase down the sides of your garment.


Increasing down a sleeve
Once you have started the sleeve, work sleeve rounds as normal until you want to Increase. Start the next round and work as normal until you are directly under the centre of the underarm. Work a 4tr group. Complete your round as normal. Begin your next round as normal. When you reach the 4tr group, work a 3tr group in the sp before it, work a 3tr group into the centre of the 4tr group (between the 2nd & 3rd tr), and work a 3tr group in the sp after it. Continue your round as normal. You will have increased by one 3tr group.
Further increases
If you need to increase further, leave at least 3, 5, 7 or 9 rounds, before starting this process again. Leaving an odd number of rounds ensures that they will line up under each other.


I used increases to flare the sleeves of this Lowrider jumper.
I hope these methods are useful and help you tailor your granny stitch garments to fit the way you want them to.
4 comments
This blog post about decreasing and increasing is so helpful! I have made several crochet tops including the Granny go round jumper and although I was pleased with the results they are rather ‘baggy’ at the back so these instructions will be very useful to give the garments a closer fit. Many thanks!
Thanks a lot for these explications, I’m french and unfortunatly it’s still difficult to understand and translate some words …. but I will acheave ! I really want to make one of your cardigan or pull. Thanks 😉😘🤗
Thanks for explaining this ! Love it and will try it in my next project!!
Hola! Hermoso tooodo.